
At last Friday's Demo Jill promised to post a tutorial on making these cute little tissue cases and here it is...


you need: one rectangle plain fabric 4" x 8" and one rectangle print fabric 3" x 8"

6 1/2" x 8" fabric for lining

one button and one piece of co-ordinating ribbon, 10" long

pin fabrics together along 8" edges and sew with 1/4" seam allowance; press seam to one side

lay right side up on mat, lining up seam with markings on mat

using grid lines on mat, lay ribbon in place, centering over the seam
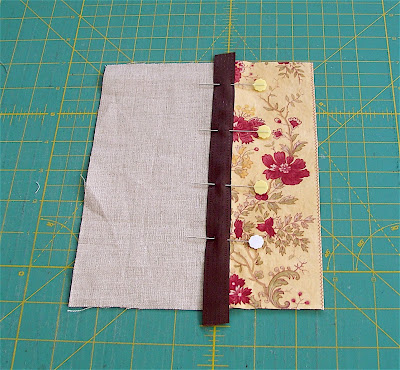
pin in place - if you wish to add a decorative button, place the last pin about 2" from edge of fabric - sew down each side of the ribbon using matching sewing thread

slide button on to ribbon and pin ribbon end in place

if you don't wish to add a button, sew right to the end

pin front piece and lining right sides together and leave a two inch opening for turning
(refer to green pins in photo above - opening should be on a long edge

sew all around, back stitching at beginning and end, and ensuring the opening is left unstitched - clip all four corners

turn right side out, pressing thoroughly - (don't bother to stitch the opening closed as it will be taken care when the sides are sewn)

lay on mat, right side up and button at the bottom
fold bottom edge up 2" and pin in place
fold top edge down 2" (the edges will overlap slightly) and pin in place
sew side seams with 1/8" seam allowance and very carefully, trim corners slightly
turn right side out and carefully push out corners; press
these are a great way to use up scraps of fabric and ribbons and make wonderful stocking stuffers or little gifts for friends...
Enjoy!
-adapted from Rachel E. Dowd's design in Pretty Little Cozies
1 comment:
Just saw your post. I'm thrilled you like my tissue cozy pattern! So excited to have a credit to my name on your blog! Thanks for sharing. :)
Rachel Dowd
Post a Comment